Prestashop crypto payments
Compatibility:
PrestaShop from 1.7.x up to 8.x
Forwarding payments

Apirone has released the PrestaShop payment module to get payments in cryptocurrencies. The module expands the opportunities for merchants who use PrestaShop for their online stores. It allows accepting payments in cryptocurrencies supported by Apirone and uses the Apirone service as a gateway to accept cryptocurrencies. The system does not store clients’ funds but forwards the payments directly to the addresses specified by the online store owner. It is called simple forwarding. Read more about it in our documentation.
Below is a step by step instruction on how to install the plugin, there is also a video at the end of the page with the process of installing and paying for the plugin.
 Plugin Installation
- 1
- 2
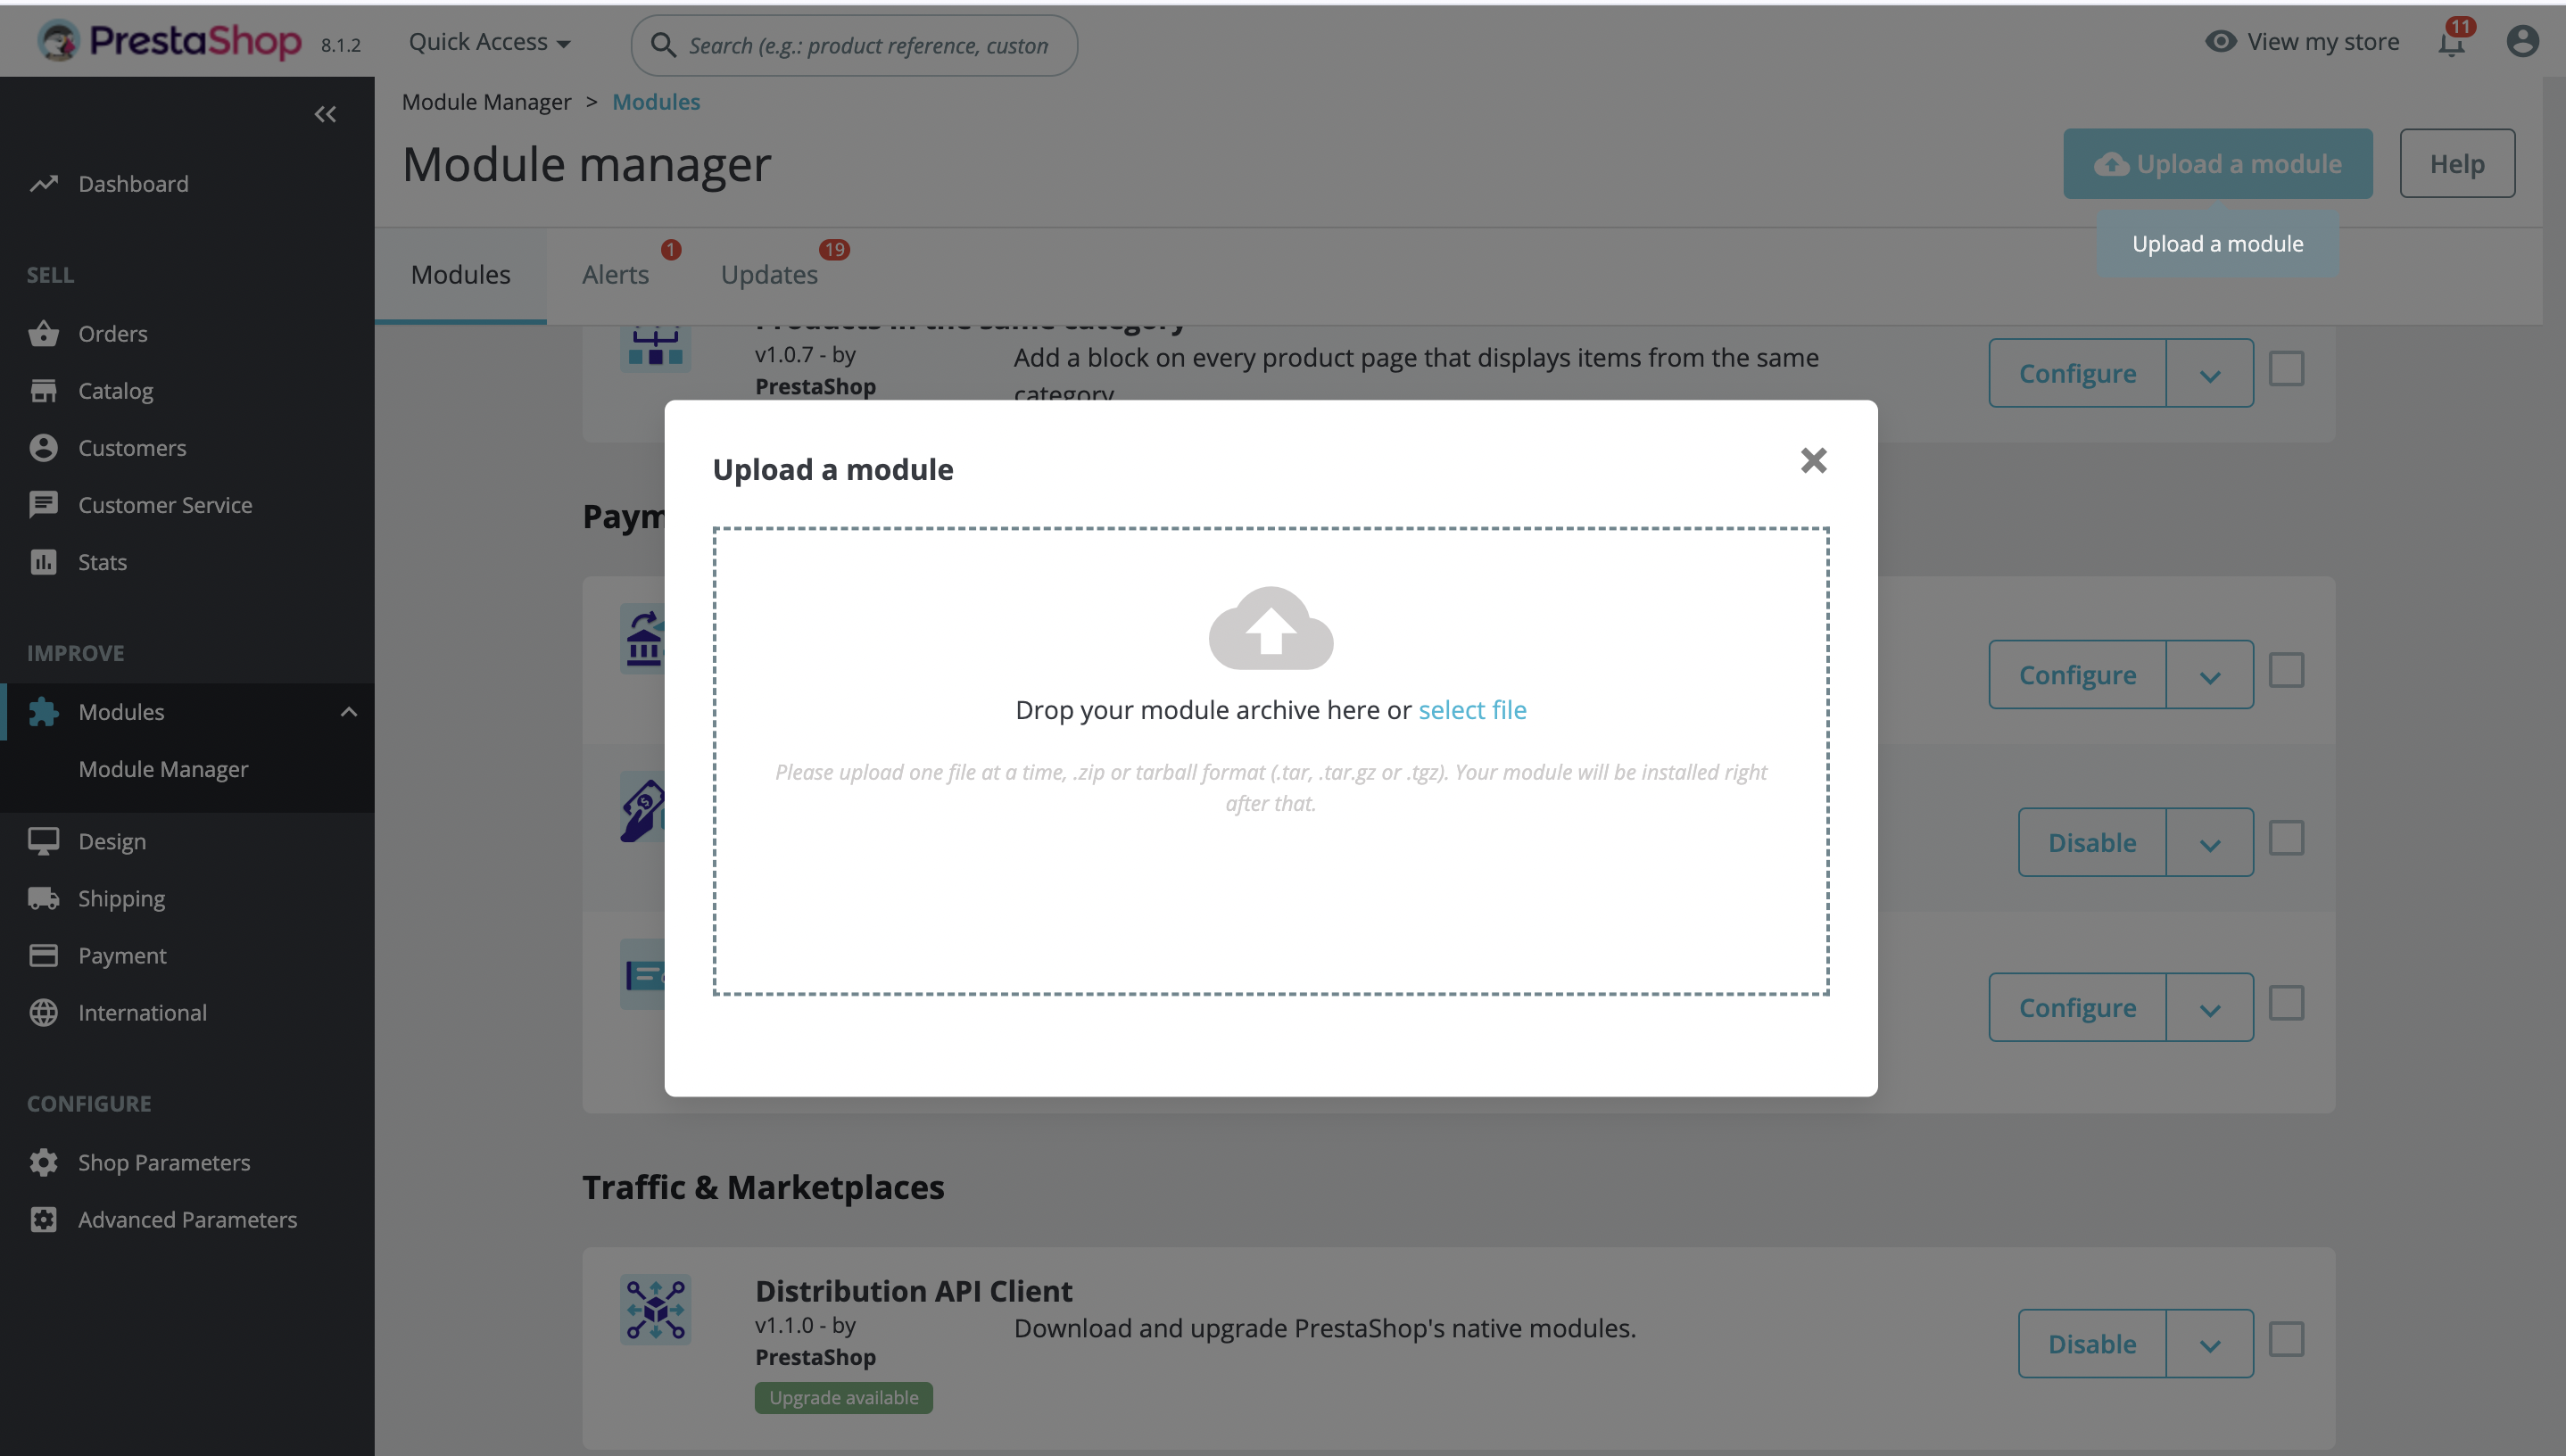
From the main menu go to Modules >> Module manager and click the Upload a module button.
- 3
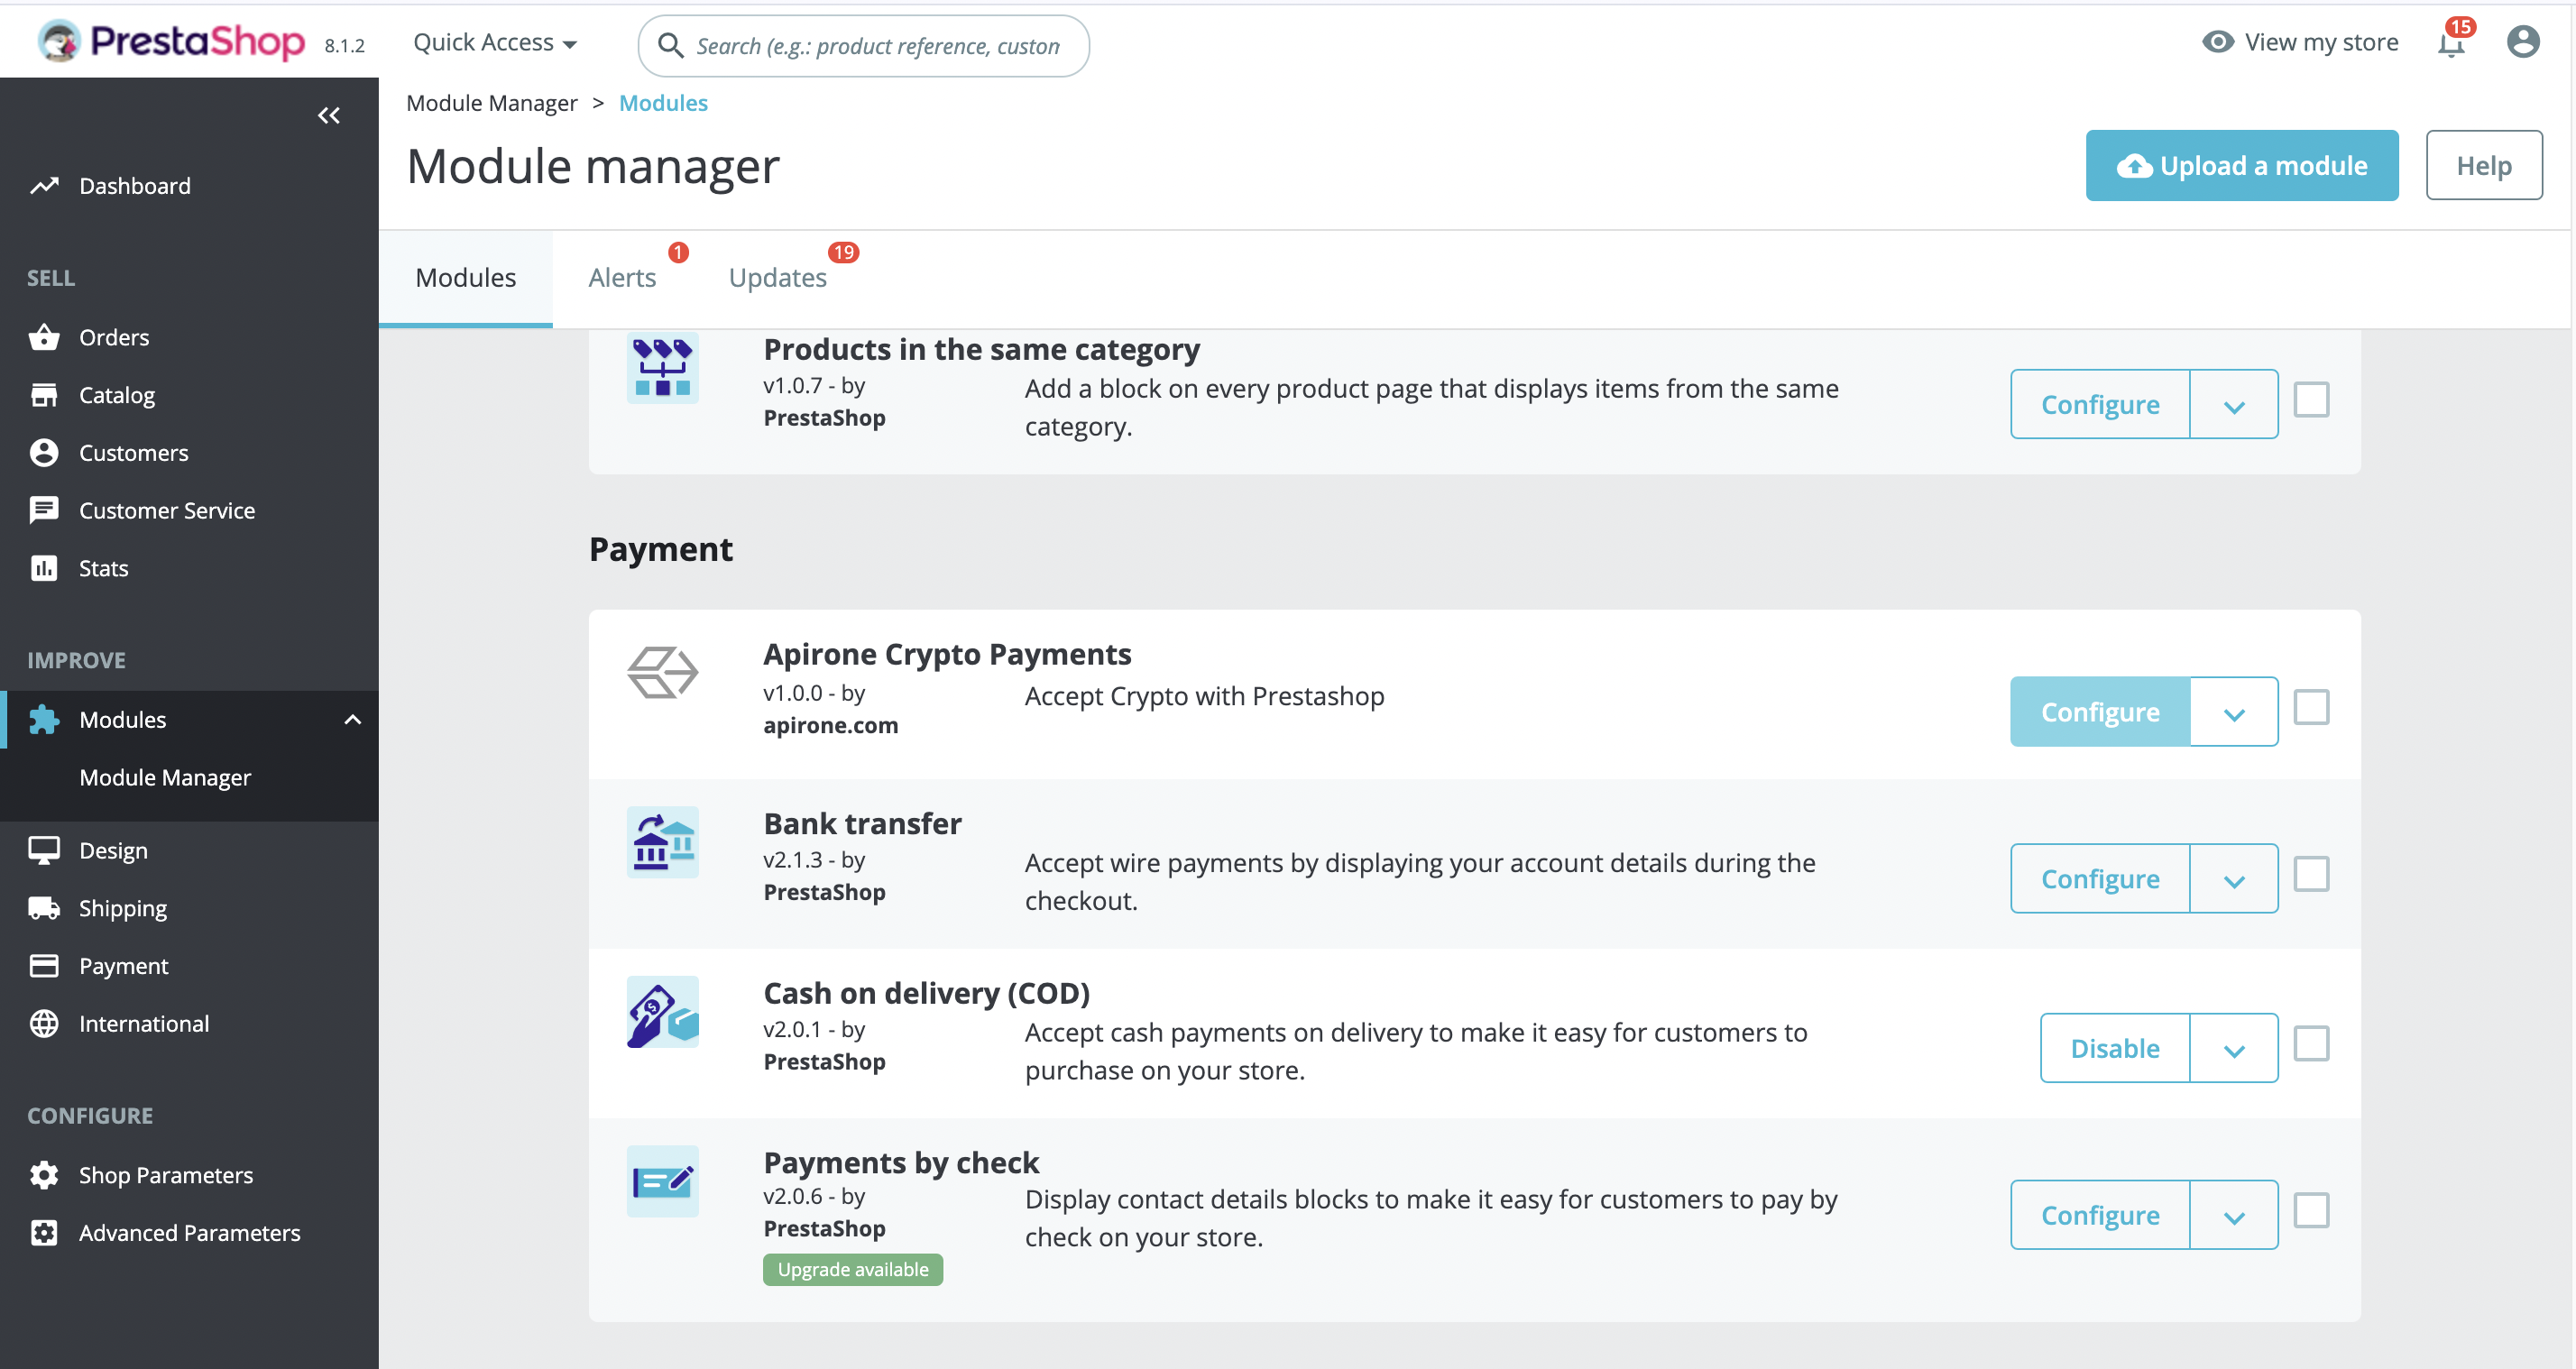
Once the module is loaded, select the payment category from the drop-down list. Find Apirone Crypto Payments and click the install button.

- 4
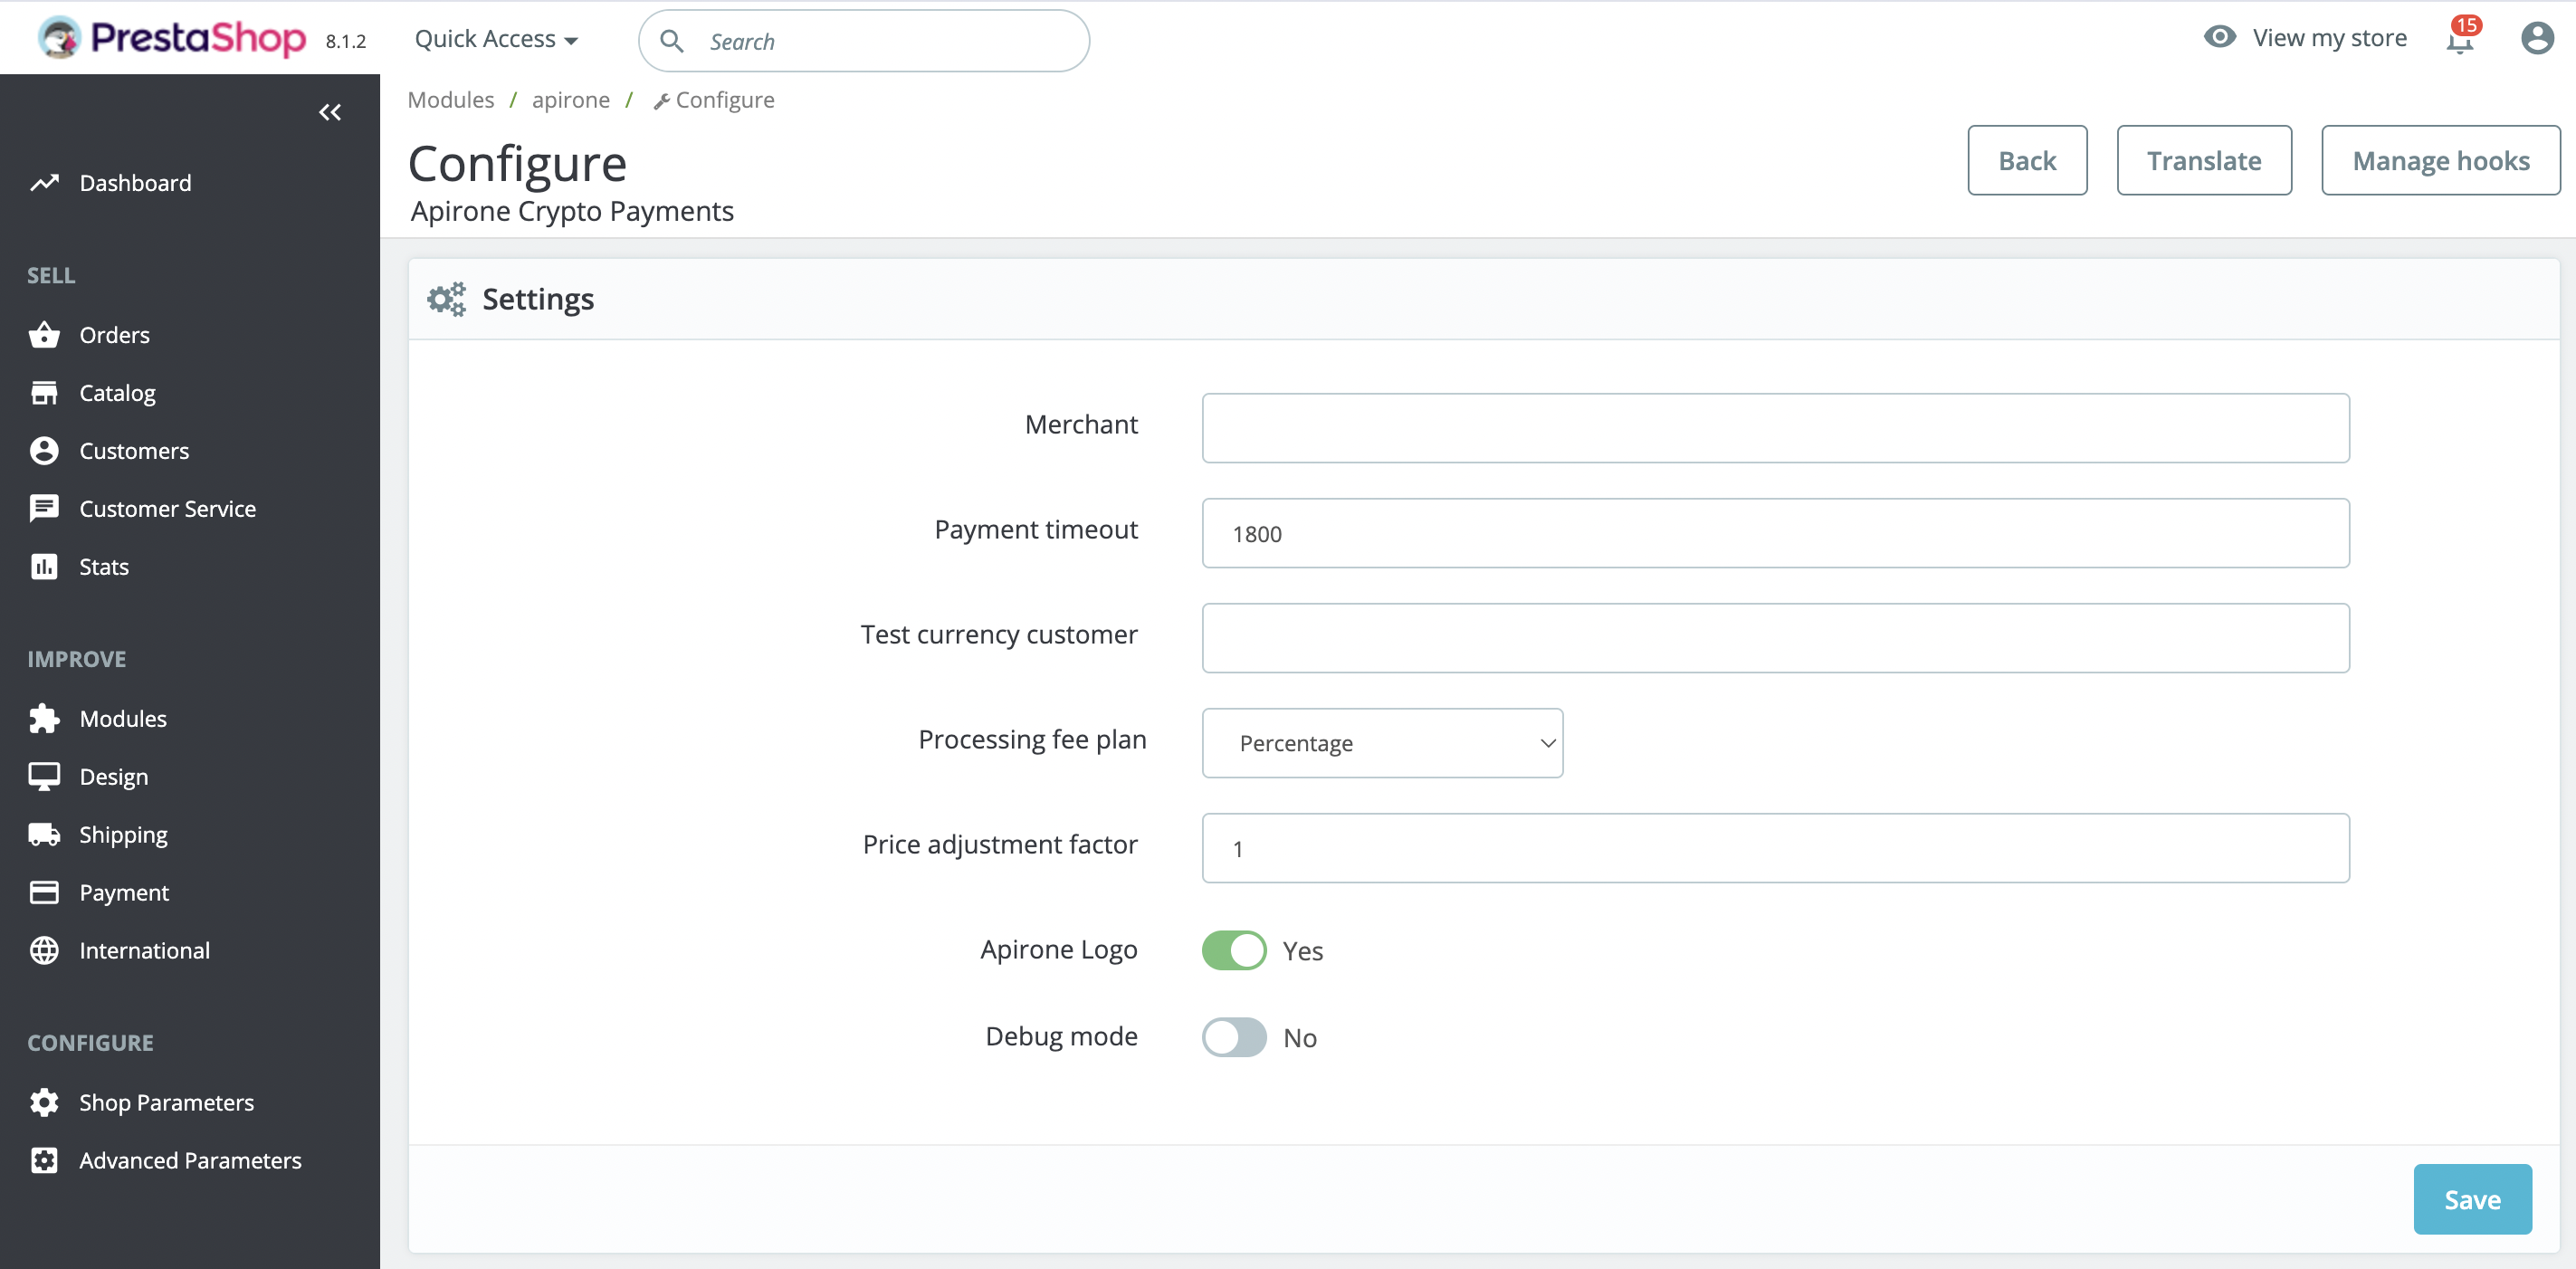
To customize all your data click the Configure button.
- 5
Step 1 - Module settings
Merchant: Show Merchant name on the plugin invoice page. If this field is empty, it will not be displayed for a customer.
Payment timeout: The period during which a customer shall pay. Set value in seconds. Default value is 1800 (30 minutes).
Test currency customer: Enter an email of the customer to whom the test currencies will be shown.
Processing fee plan: Processing fee plan may be percentage or fixed. More information see on Pricing page .
Price adjustment factor: If you want to add/subtract percent to/from the payment amount, use the following price adjustment factor multiplied by the amount.
For example: 100% * 0.99 = 99% | 100% * 1.01 = 101%
Apirone Logo: Show the Apirone logo on the invoice page.
Debug mode: Write debug information into the log file.
- 6
Step 2 - Setup your cryptocurrencies addresses
Fill in the addresses of the currencies you want to accept. All currencies that have Testnet in their names are used for testing purposes and are displayed to the user whose email is specified in the Test currency customer field.
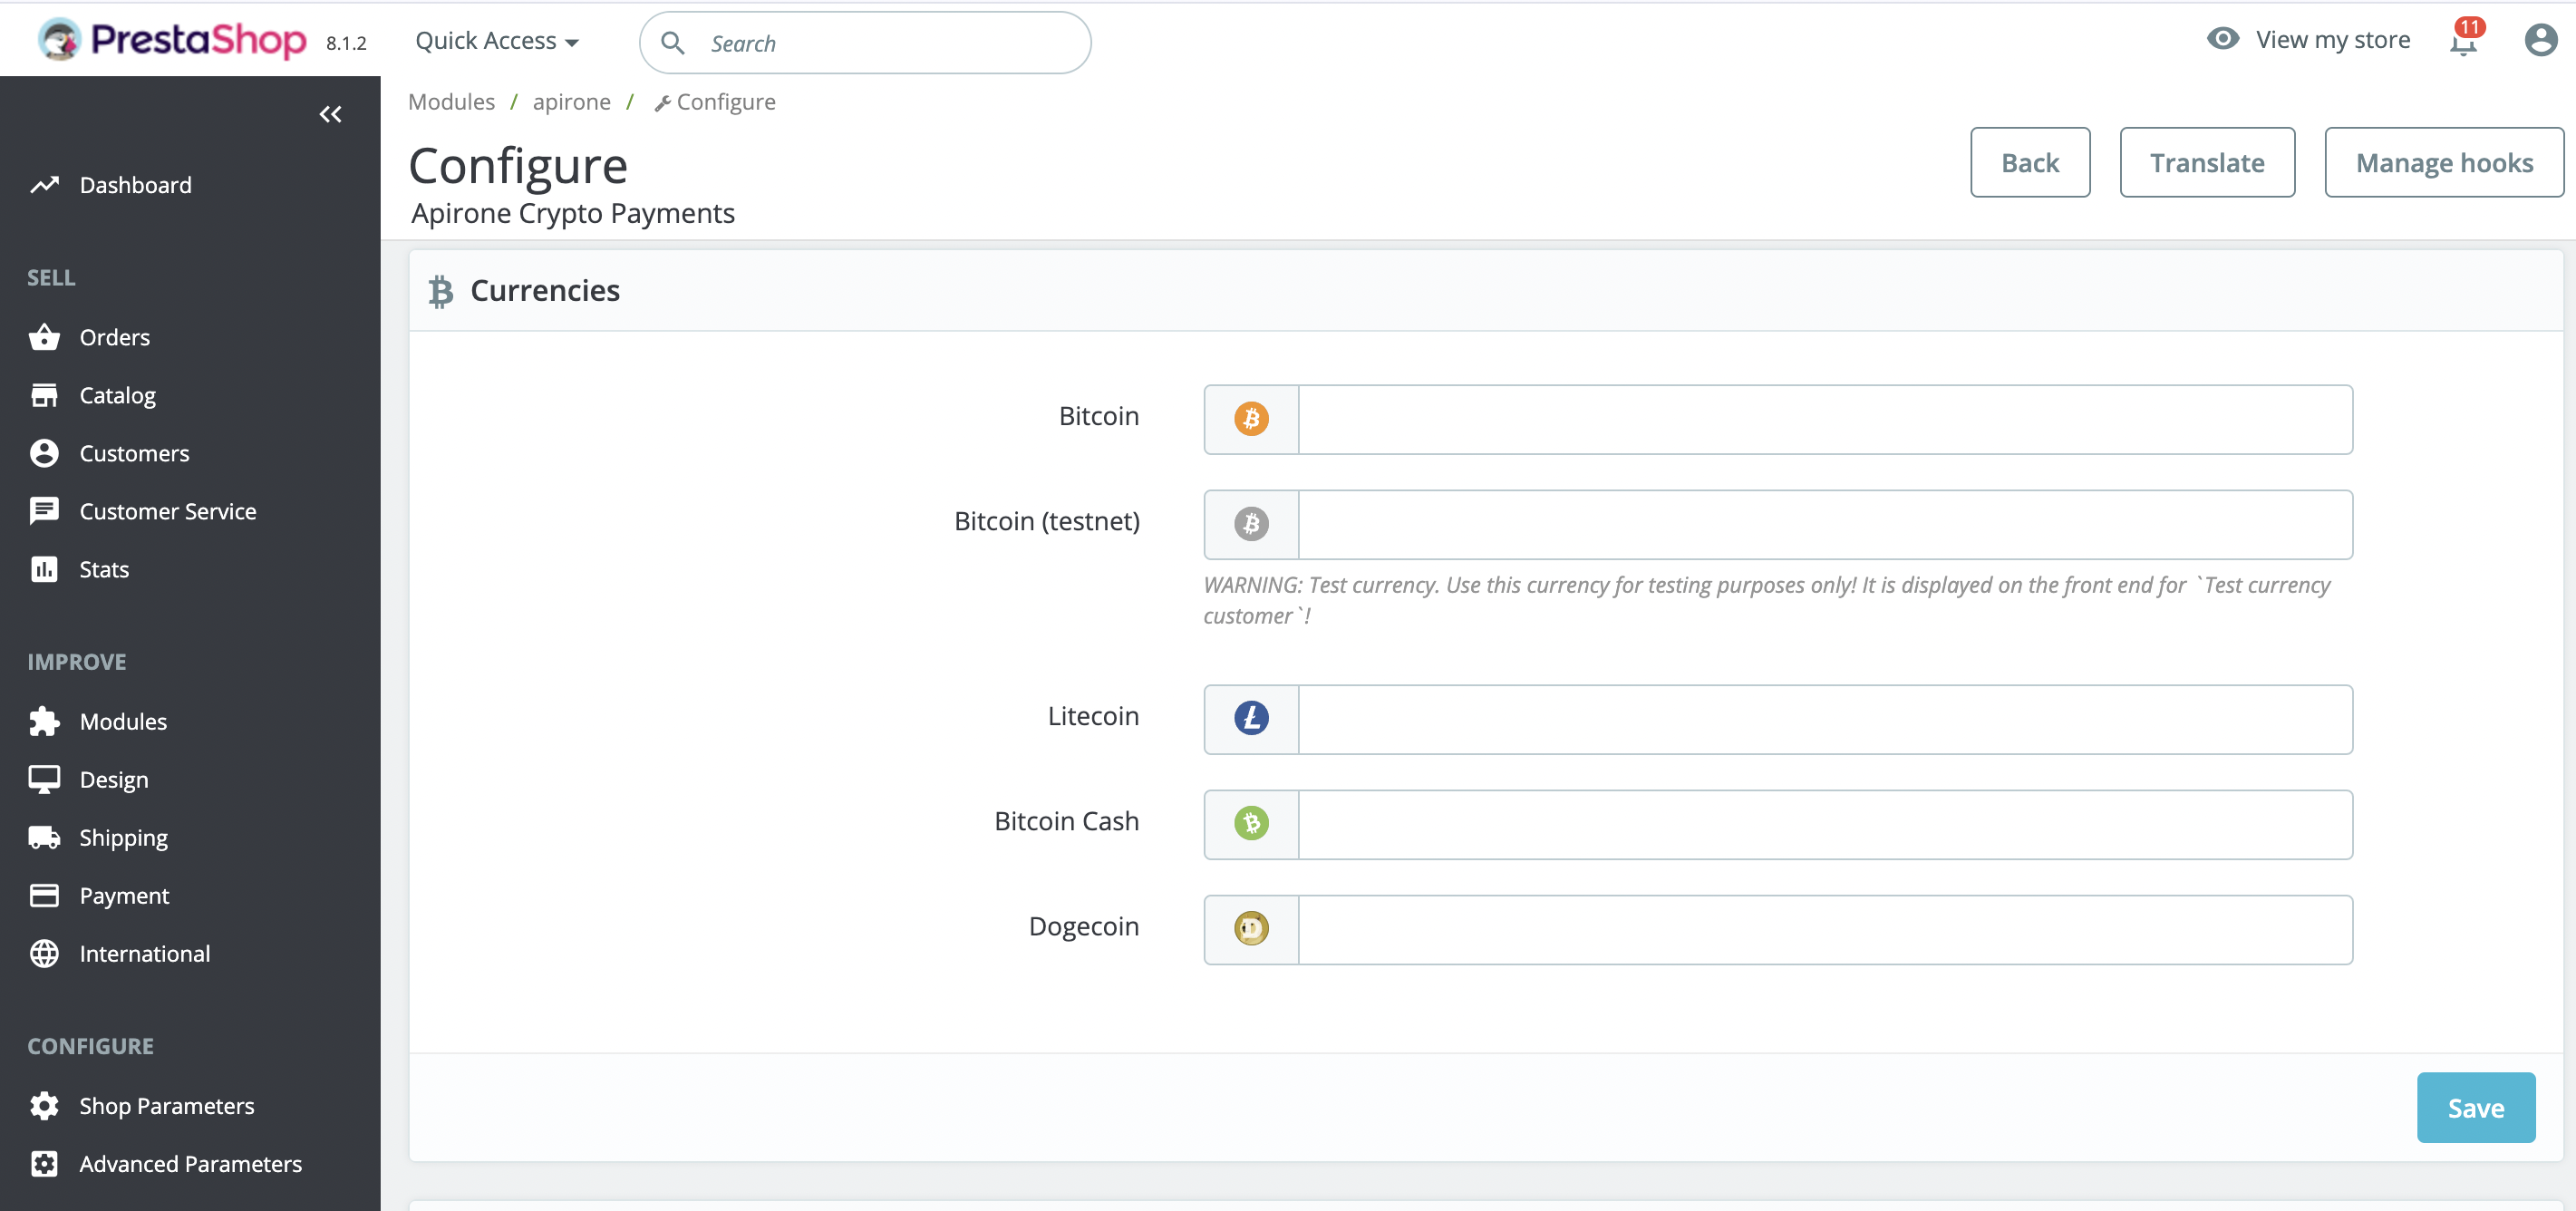
Attention! Each form is saved separately.
How do I install the plugin
How does it work
Examples of use on
Testing Bench